")
")

Designing a house plan can be difficult if you’ve never done it before. CorelDRAW 2022 is a perfect software for vector drawings, including house blueprints. If you want to learn how to create a house plan in CorelDRAW, this is the guide to follow.
Starting and creating the floor plans
- After creating a new document, turn the document to a landscape position. To do this, select Landscape in the “Property bar”.
 Click on the Landscape in the “Property bar”.
 - Start by drawing the walls of the house. You can do this using the Freehand tool. To draw straight lines with this tool, click once where you want the beginning of your line to be, and while holding Shift, click where you want the end of your line to be.
Click on the Freehand tool. You can also use the Rectangle tool, which allows you to draw closed rectangles and squares. If you want to draw a perfect square with this tool, hold down CTRL while drawing with the Rectangle tool.

The Rectangle tool in CorelDRAW.
- Once you have a rough layout of your walls, select everything and change the Outline width to 7.0 pt (or any number you are happy with).

Change the Outline width to 7pt. - After that, select everything again and press Ctrl + G on your keyboard to group the walls. You can also press P on your keyboard to center your drawing.
How to Draw Doors
- First, draw a rectangle of 1.4mm x 17mm. You can adjust the specific width and height in the “Property bar”.
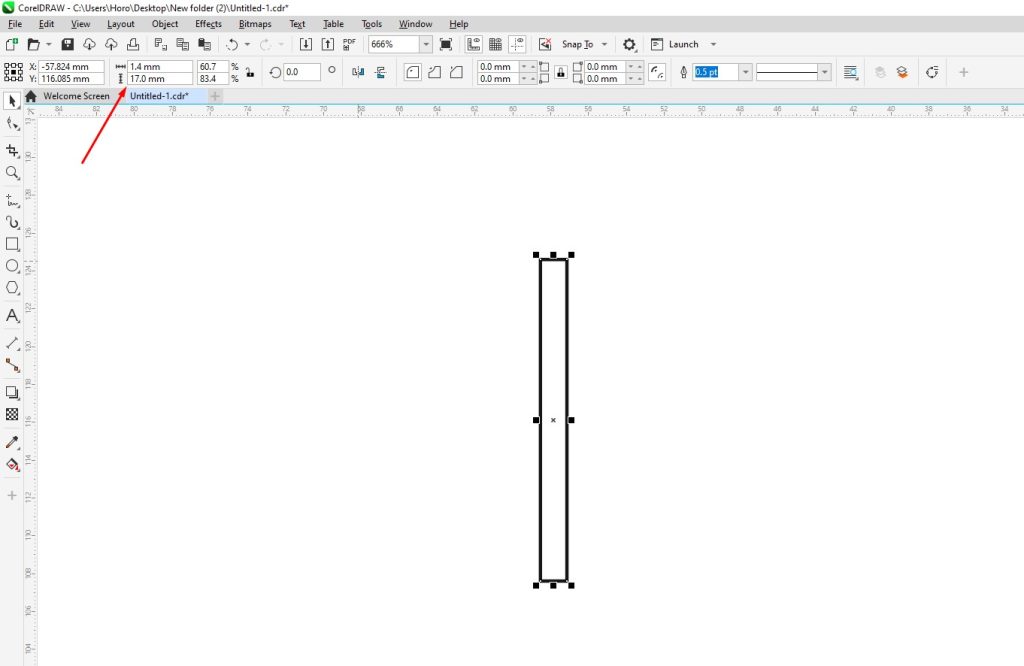
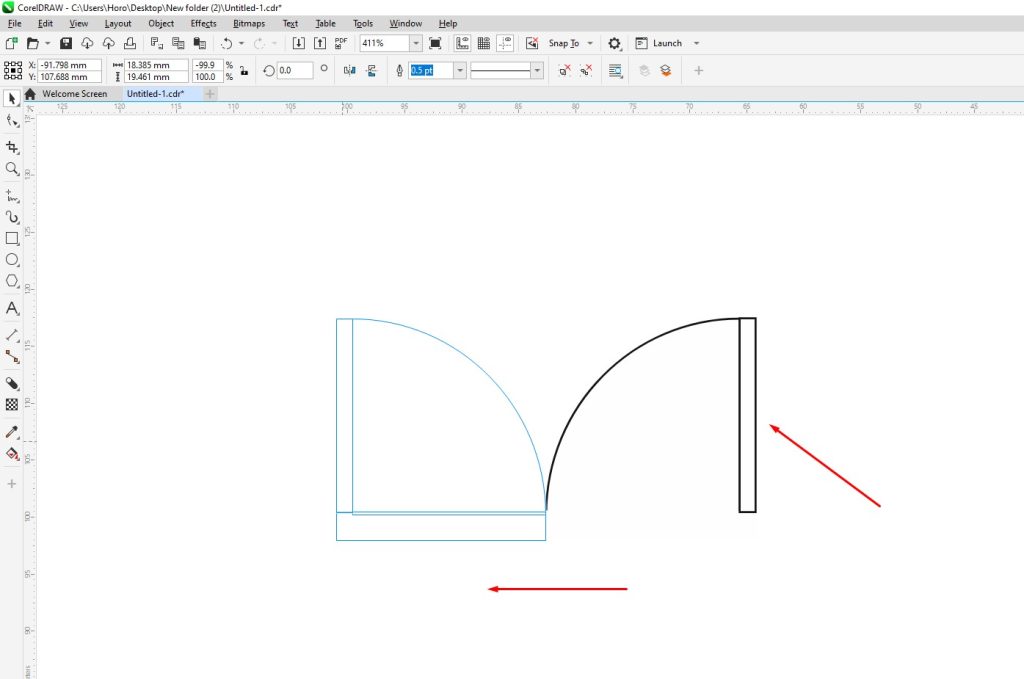
Draw a rectangle with the Rectangle tool. - Next, select the Ellipse tool. To draw a perfect circle around the rectangle, click on the lower left node of the rectangle and draw a circle while holding CTRL and Shift.

Draw a circle around the rectangle with the Ellipse tool. - While the circle is selected, click on the Shape Tool. Then click on the node and hold CTRL while sliding it to the left.

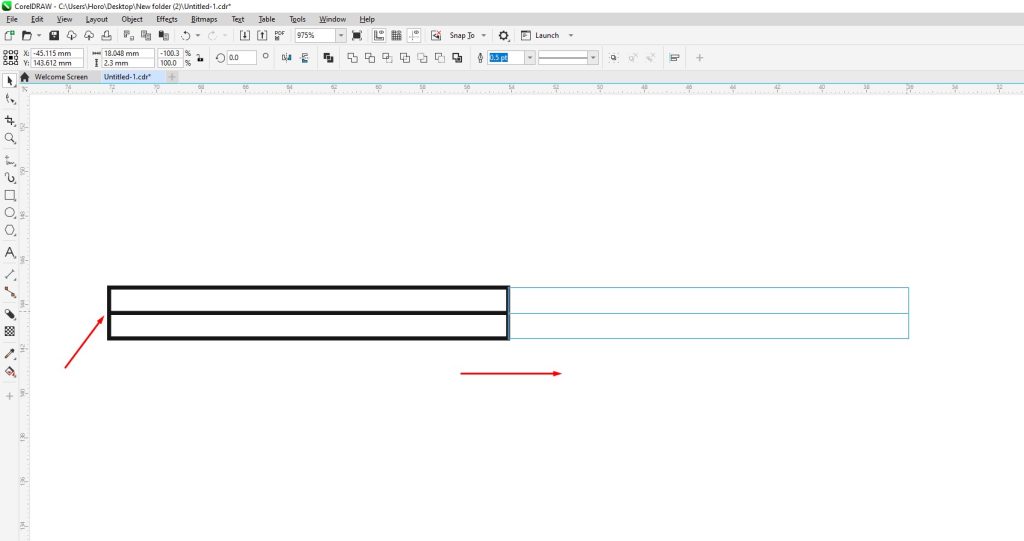
Click on the node and slide it to the left while holding Ctrl. - Add another rectangle at the bottom of the door. It should be wider than the walls – in our case, wider than 7pt. Place it on the lower part of the door. In the color palette section on the right side of your CorelDRAW window, both right and left-click on the White color. Right-clicking on a color in CorelDRAW will outline the object, while left-clicking on a color will color the closed object.

Draw a rectangle at the bottom and color it white. - Next, select the rectangle on the right side of the door, and press CTRL + Page Up to bring it in front of the White rectangle. Select all the door parts and press CTRL + G to group them. This makes it easier to move or resize the entire door.

Select the rectangle on the right and press Ctrl + Page Up. - To create a double door, select the door, press Ctrl + C, and then Ctrl + V. Click on the midpoint on the right side of the door and drag it to the left side while holding Ctrl.
Copy and paste the door, click on the midpoint on the right and drag the door to the left while holding Ctrl. - Here are some different types of door illustrations you can use:
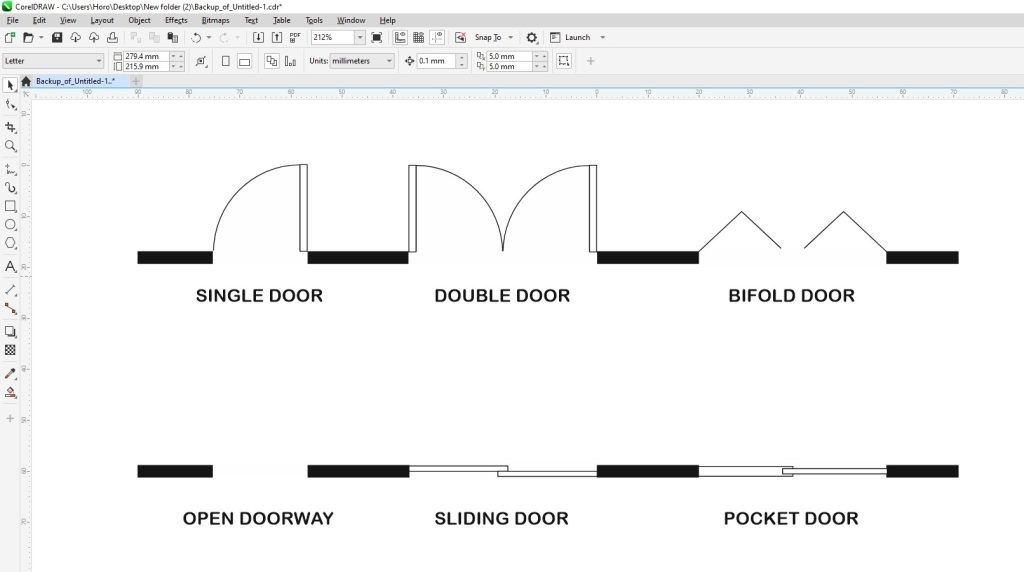
Different types of doors.
How to Draw Windows
- Start by drawing a rectangle approximately the same width as your walls. In our case, the window should be 18mm x 2.3mm.

Use the Rectangle tool to draw a window. - Using the Freehand tool, click on the midpoint of the rectangle on the left side. Then click on the midpoint of the rectangle on the right side while holding Shift. Color the window white by right-clicking on the White color from the color palette on the right side.

Use the Freehand tool, click on the midpoint on one side of the rectangle, and drag it to the other side. - To create a double window, select the window you created, and press Ctrl + C and Ctrl + V. Then click on the midpoint on the left side and drag it to the right while holding CTRL.
Copy + Paste the window, then click on the midpoint on one side and drag it to the other while holding Ctrl. - If you want to rotate the windows or doors, adjust the Angle of rotation in the “Property bar”.
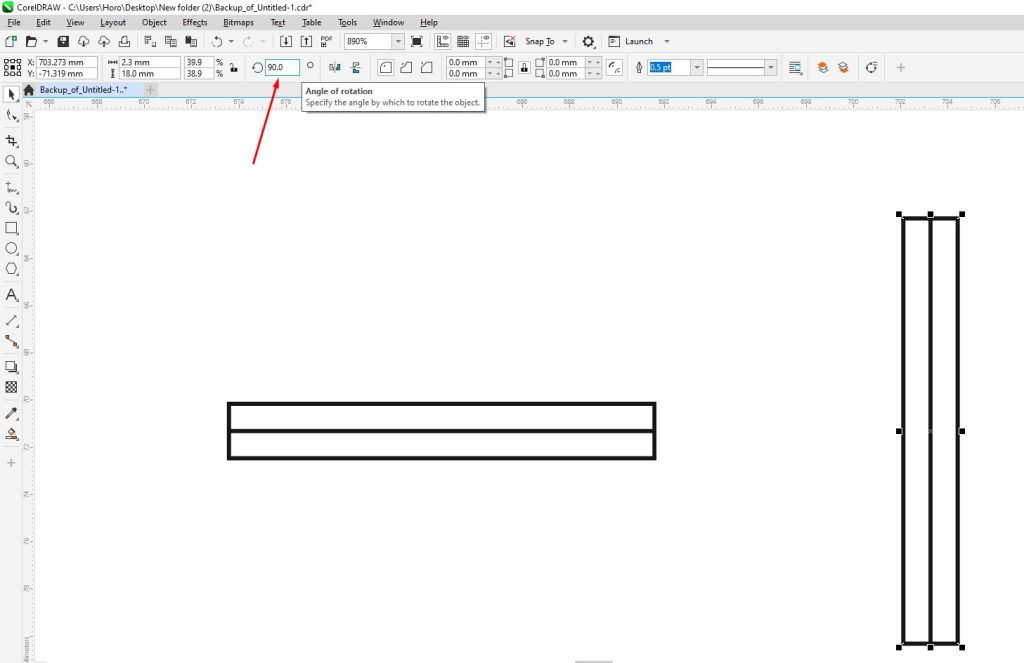
Rotate the objects with the Angle of rotation.
How to Draw a Staircase
- Use the Rectangle tool to create the shape of the stairs. In this case, it should be approximately 20mm x 53mm.
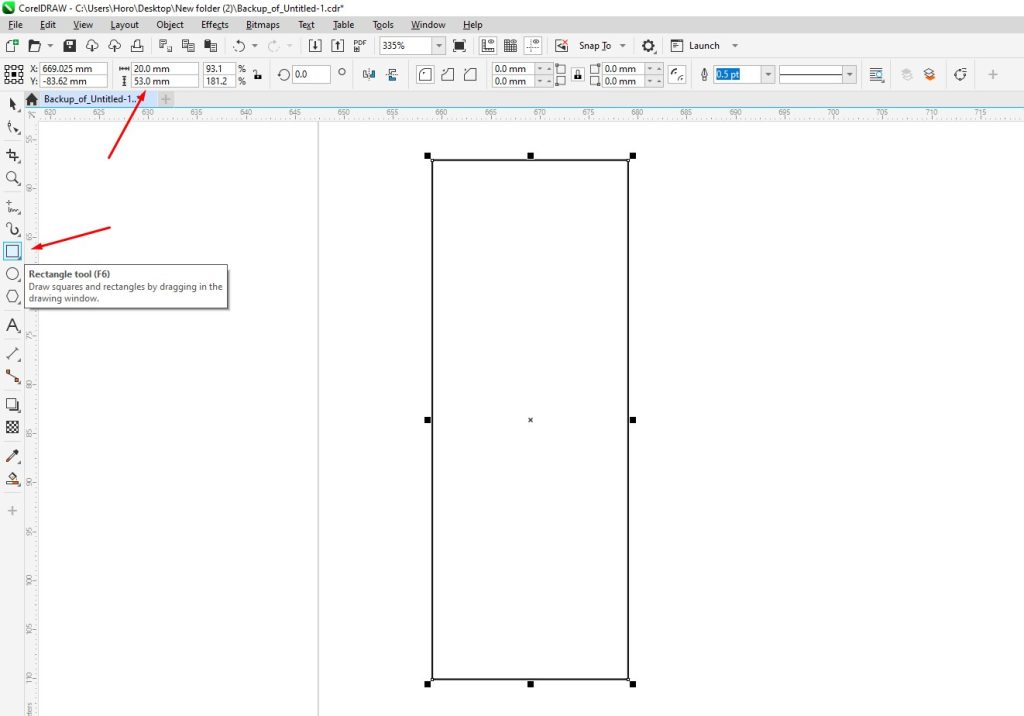
Draw a rectangle and adjust the width and height. - Use the Freehand tool and draw a line on the top of the rectangle.

With the Freehand tool draw a line on top of the rectangle. - While having that line selected, go to Edit > Step and Repeat.
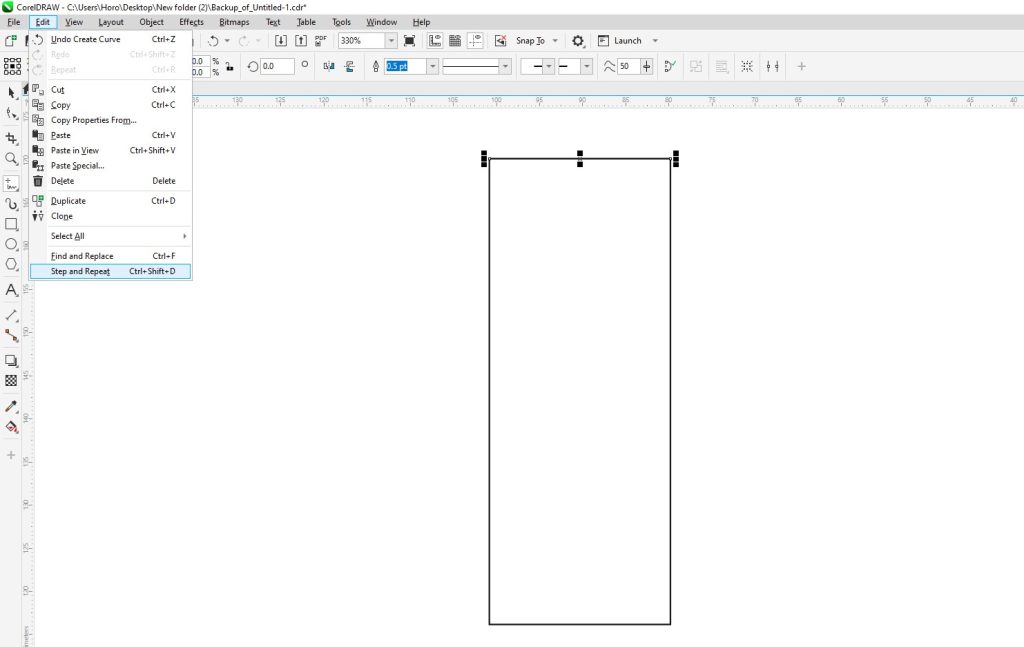
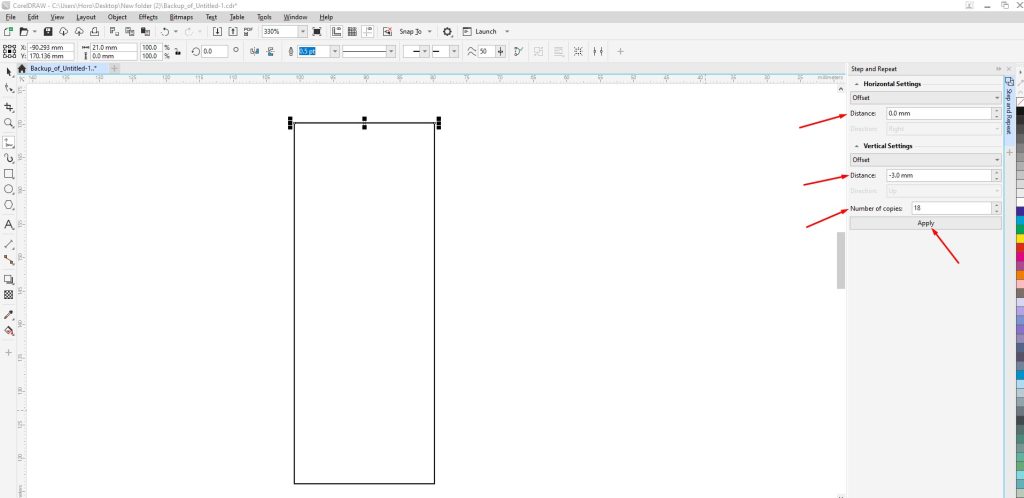
With the line selected, go to Edit > Step and Repeat - A window will appear on the right side of the program. Under “Horizontal Settings” make the Distance 0 mm. Under “Vertical Settings” make the Distance -3 mm, and the Number of copies 18. Then click Apply.
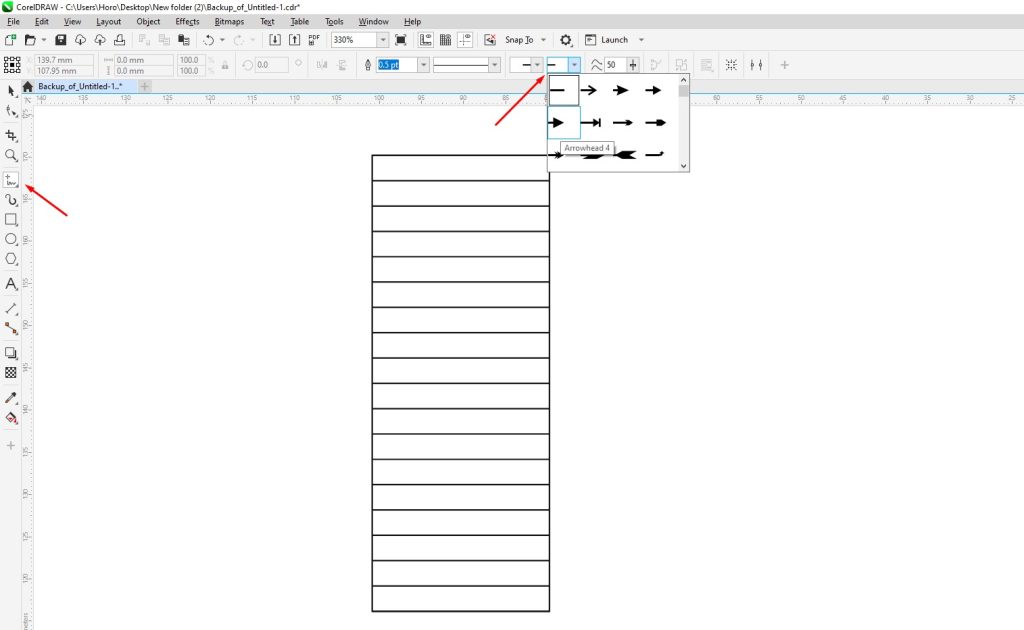
Adjust the Paste and Repeat options. - Select the Freehand tool again, and in the “Property bar” select the end of the line to be an arrow. We chose Arrowhead 4.
Create an arrow from the Freehand tool. - Next, draw a straight line upwards in the middle of the staircase. The beginning of the line marks the beginning of the staircase. After, select all the objects on the staircase and group them by pressing Ctrl + G.

Select all the staircase parts and press Ctrl + G to group them. - Here are different types of staircases you can use:
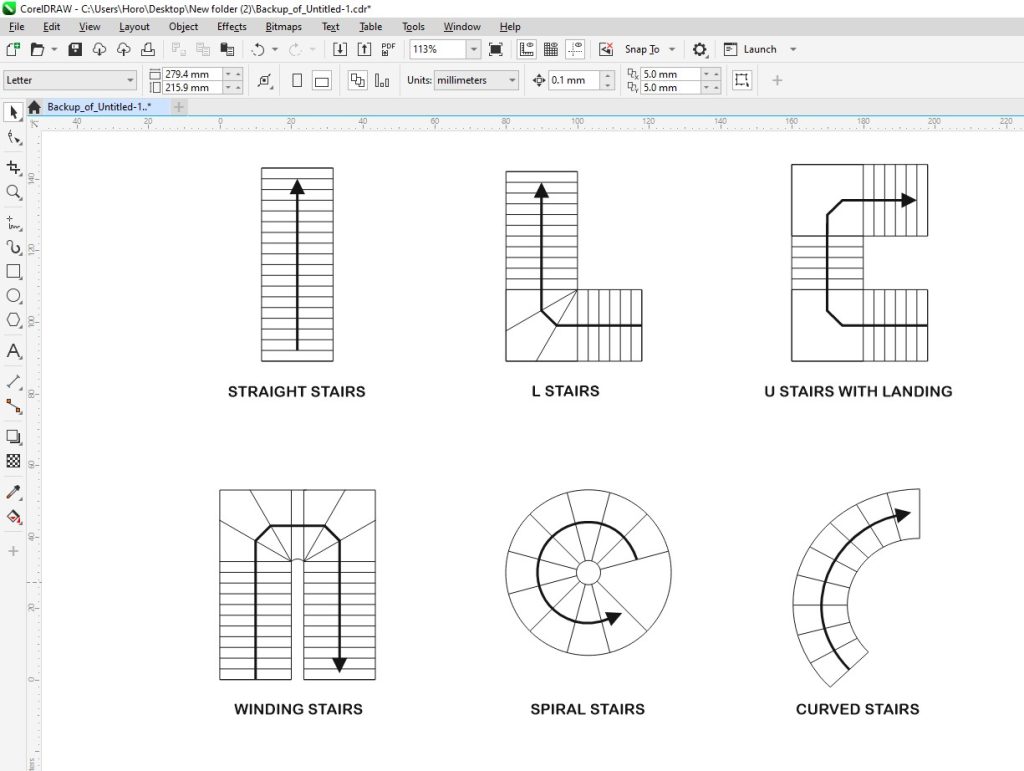
Different types of staircases.
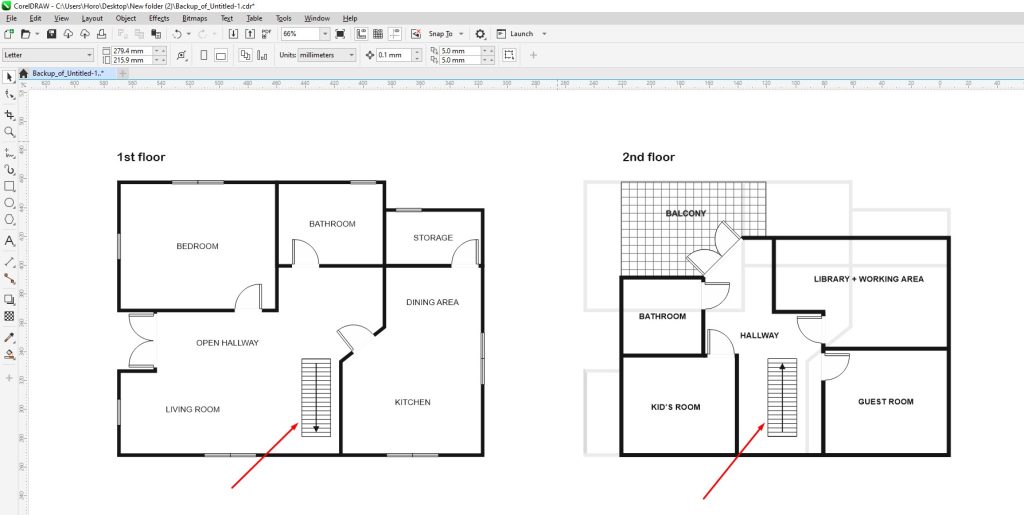
How to Draw a Second Floor
While there is no specific way to mark the 2nd-floor plan, pay attention to the arrow on the staircase. You could also make the outline of the bottom floor a brighter color.
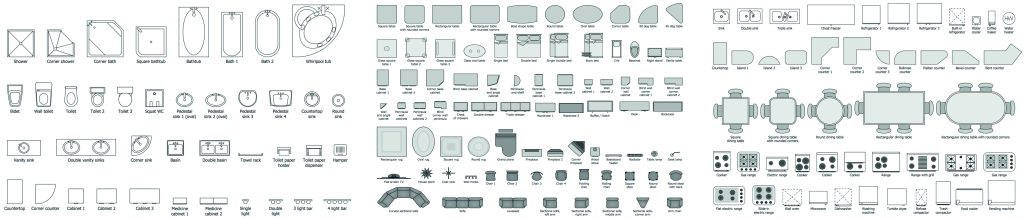
How to Draw Furniture and Other Objects: